 how-to
How to Avoid ADU Construction Delays: A 2026 Guide
Table of Contents
- What You'll Need Before You Break Ground
- Step 1: Lock Down Your Building Permit and Plan Review
- Step 2: Use an ADU Permit Checklist to Catch Issues Early
- Step 3: Hiring an ADU Contractor Without Getting Burned
- Step 4: Coordinate Utilities and Site Preparation
- Step 5: Manage Design Changes and Material Procurement
- Step 6: Build a Contingency Plan for Weather and Seasonal Delays
- Step 7: Use Digital Project Management Tools to Track Milestones
- Frequently Asked Questions
Last Updated: September 20, 2026
What You'll Need Before You Break Ground
Most ADU projects don't stall because of bad luck. They stall because of gaps in the pre-construction phase. ADU construction delays almost always trace back to something that could have been caught before the first shovel hit the dirt.
Here's what you need before you start:
- A property survey and site plan
- Zoning regulations review for setbacks and height limits
- A realistic project timeline with buffer weeks built in
- A clear scope of work written down
- Your financing approved, not just pre-qualified
Step 1: Lock Down Your Building Permit and Plan Review
The building permit is your gate. Nothing moves until the planning department signs off.
How Long for ADU Permit Approval?
Most jurisdictions take time for ADU permit approval, depending on local review volume and whether your plans need corrections. Some cities run faster. Others are buried.
Step 2: Use an ADU Permit Checklist to Catch Issues Early
An ADU permit checklist is a simple document that lists every item your local planning department requires before they'll review your plans. It's the cheapest insurance you can buy.
Build yours from these categories:
- Zoning compliance: setbacks, height, lot coverage
- Structural engineering calculations
- Foundation inspection requirements
- Utility connection plans
- Code compliance notes for egress, fire, and energy
Step 3: Hiring an ADU Contractor Without Getting Burned
Hiring an ADU contractor is where good projects go bad. But before you vet anyone, you have to decide who is actually running the job: a licensed general contractor or you as the owner-builder. That decision drives your timeline risk more than any single hire.
Owner-Builder vs. General Contractor: The Timeline Trade-Off
| Factor | Owner-Builder | Licensed General Contractor |
|---|---|---|
| Schedule control | You set it, but you also own every slip | GC sequences trades and inspections |
| Licensing | You may need an owner-builder permit or exemption | GC license required in most states |
| Insurance and bonding | You carry the risk | GC carries liability and workers' comp |
| Subcontractor management | You hire and schedule each trade | GC manages subs and punch lists |
| Warranty exposure | You are the warranty | GC warranty and callbacks |
| Typical timeline reliability | Lower, one missed sub cascades | Higher, GC has backup subs |
Most owner-builders underestimate the inspection sequencing. If you are not on site daily, a missed rough-in inspection can push framing back a week or more. A GC with an established sub list absorbs that shock; an owner-builder usually does not.
How to Vet an ADU Contractor
Ask for and verify:
- A current license number you can look up on your state's licensing board
- Three recent ADU projects with references you can call
- Proof of general liability insurance and workers' compensation
- A written scope of work with line-item pricing, not a lump sum
- A schedule with milestone dates and a change-order process in writing
Walk away from anyone who won't put timelines in writing. Verbal promises don't survive a material shortage.
The Contract Clauses That Protect Your Schedule
- Liquidated damages or delay clause. Defines what happens if the GC misses milestone dates.
- Change-order procedure. Requires written approval and a cost-and-time impact before any change.
- Utility and trenching exclusions. States clearly who owns utility coordination and off-footprint trenching.
- Inspection responsibility. Names who books and attends each inspection.
- Payment schedule tied to milestones. Pay on inspection passes, not on calendar dates.
The real difference between a smooth build and a nightmare comes down to how the contractor handles change orders. Good ones document everything. Bad ones surprise you with cost overruns.
Step 4: Coordinate Utilities and Site Preparation
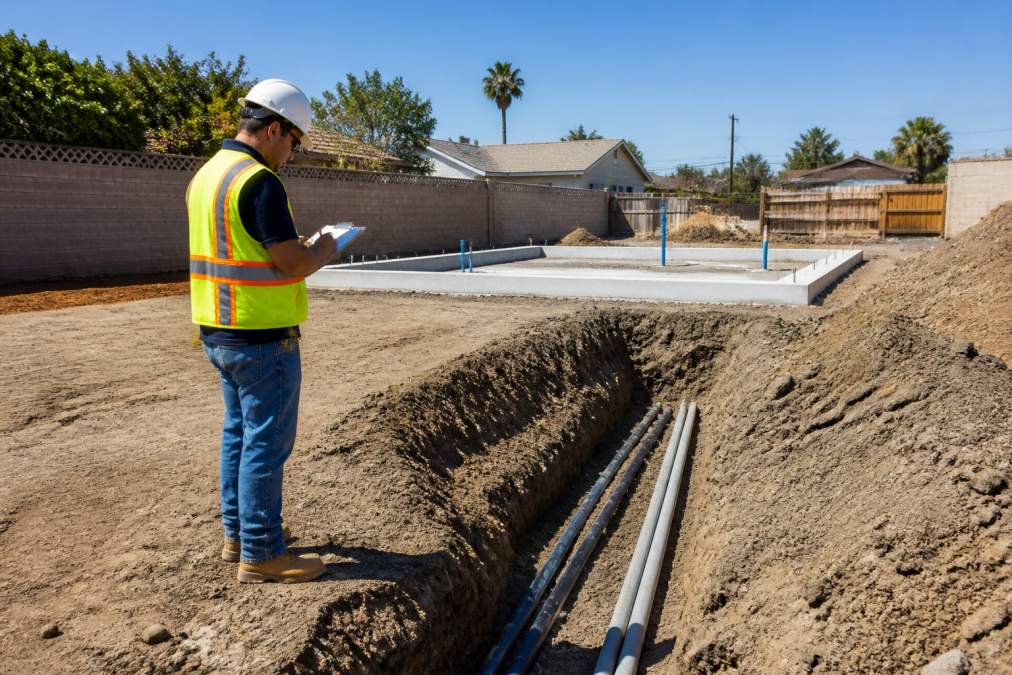
Utility connection delays are the quiet killer of ADU schedules. Power, water, sewer, and sometimes gas work sit outside your contractor's control, and the scheduling queue starts the day your permit is approved, not the day you break ground. Most guides stop at "get your permit." The real bottleneck is what happens after.
The Post-Permit Utility Sequence Most Owners Miss
Once your building permit is issued, utility coordination runs on its own clock. Treat it as a parallel workstream, not a task you pick up when the foundation is poured.
- Confirm your service point and capacity. Ask the local water and sewer authority whether your existing lateral and meter can carry the ADU's load, or whether you need a new tap, upsized meter, or separate service. A capacity shortfall discovered late can force a redesign.
- Submit the utility service application. Most municipal water, sewer, and electric providers require a separate application and sometimes a separate fee, distinct from your building permit. Submit it the week your permit is issued.
- Schedule the site visit and staking. Providers typically send a crew to mark the connection point and confirm trench depth, conduit size, and meter location before you dig. Missing this step means re-inspection and re-scheduling.
- Coordinate trenching with your foundation schedule. The trench for the sewer lateral and water line usually has to be open and inspected before backfill. If your excavator has already demobilized, you pay a second mobilization fee and lose days.
- Book the meter set and final connection. This is the last step and often the longest wait. Meter installation and energization can lag the physical connection by days to weeks depending on the provider's workload.
Site Preparation Runs on the Same Parallel Track
Site prep is not just clearing dirt. It is the sequence that makes every later inspection possible.
- Staging and access plan. Decide where materials, dumpsters, and equipment will sit. A plan that blocks the trench path or the inspection access point costs you a re-mobilization.
- Erosion and sediment control. Many jurisdictions require best management practices (BMPs) installed and inspected before any ground disturbance. Skipping this triggers a stop-work order.
- Foundation inspection booking. Book the foundation inspection the day the forms and rebar are complete, not the morning of. Inspection backlogs of one to three weeks are common in high-volume jurisdictions.
- Material delivery windows. Schedule deliveries so they land after the foundation passes, not before. Materials sitting on an unapproved site can be damaged or stolen.
A Simple Utility and Site Prep Checklist
- Confirm water, sewer, and electric capacity for the ADU load
- Submit utility service applications the week the permit is issued
- Get the provider's connection timeline in writing
- Schedule staking and site visit before any trenching
- Install erosion and sediment controls before ground disturbance
- Book the foundation inspection the day forms are complete
- Confirm trench inspection is scheduled before backfill
- Track meter set and energization as a separate milestone
Step 5: Manage Design Changes and Material Procurement
Design changes during construction are expensive. Change orders slow the project timeline and often trigger a return trip to plan review.
Freeze your plans before you submit for permits.
Step 6: Build a Contingency Plan for Weather and Seasonal Delays
Weather stops work. That's not a risk, it's a certainty. What separates a delayed project from an on-time one is whether you planned for it.
Build in these buffers:
| Risk | Typical Impact | Mitigation |
|---|---|---|
| Heavy rain | 3-10 lost work days | Schedule framing outside wet season |
| Freeze events | Foundation and concrete delays | Pour before first frost |
| Material backorders | 2-6 week slips | Order early, confirm lead times |
| Inspection backlog | 1-3 week waits | Book inspections the day prior task ends |
Step 7: Use Digital Project Management Tools to Track Milestones
Digital tools turn a chaotic build into a tracked one. You don't need enterprise software. A shared project board works.
Track these project milestones:
- Permit submission and approval dates
- Site prep completion
- Foundation inspection pass
- Framing, rough-in, and final inspections
- Utility connection dates
Frequently Asked Questions
What are the most common causes of ADU construction delays?
The biggest culprits are incomplete permit applications, design changes during construction, material procurement issues, and utility connection delays. Many homeowners also lose weeks waiting on plan review corrections. Using a permit-ready plan and a detailed ADU permit checklist can help you catch these issues before they snowball.
How long does ADU permit approval typically take?
Permit approval timelines vary widely by jurisdiction, but typically take time from submission to issuance. Factors include completeness of your application, local planning department workload, and whether your design requires discretionary review. Submitting a permit-ready plan with all required documents can reduce back-and-forth and shorten the wait.
What should I include in my construction contract to prevent delays?
Your contract should specify a detailed scope of work, project milestones with dates, a process for change orders, and consequences for missed deadlines. Include a clause about excusable delays (like weather or material shortages) and require your contractor to provide a schedule before starting. Clear communication expectations and a dispute resolution process also help.
How can I speed up the ADU permit approval process?
Submit a complete application with PE-stamped drawings and a thorough ADU permit checklist. Pre-application meetings with your planning department can clarify local ordinances and zoning regulations. Respond to correction requests within 24-48 hours. Some jurisdictions offer expedited review for affordable housing or pre-approved plans, so ask about those options early.
ADU construction delays rarely come from one big failure. They come from a dozen small gaps that compound. Lock your permits, vet your contractor, coordinate utilities early, and track every milestone. If you want plans that clear review the first time, get started with QuiPlans and move from concept to construction with fewer surprises.